本文介绍了如何在windows平台进行apache服务器的下载、安装和配置过程。
1.下载
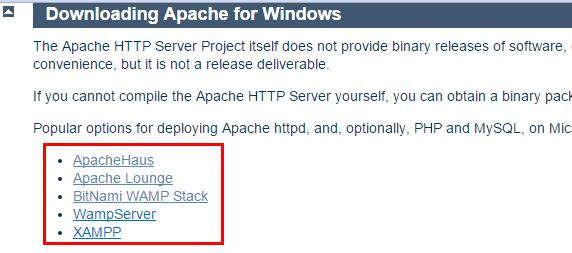
首先进入apache for windows的官方下载地址[猛戳这里],依次在下列页面进行下载操作:
我这里下载的安装包名称为:httpd-2.4.18-x64-vc11-r2.zip。
2.安装
将下载好的文件解压到磁盘目录下,比如:D:\Programs\Apache24,然后接下来进行配置工作。
3.配置
进入D:\Programs\Apache24\conf目录,找到httpd.conf文件,进行如下配置工作:
1)修改Apache程序的位置
将SRVROOT修改为你具体放置的位置,具体如下:
#
# ServerRoot: The top of the directory tree under which the server's
# configuration, error, and log files are kept.
#
# Do not add a slash at the end of the directory path.  If you point
# ServerRoot at a non-local disk, be sure to specify a local disk on the
# Mutex directive, if file-based mutexes are used.  If you wish to share the
# same ServerRoot for multiple httpd daemons, you will need to change at
# least PidFile.
#

Define SRVROOT "D:/Programs/Apache24"
ServerRoot "${SRVROOT}"
2)修改email地址
将ServerAdmin的email修改为你的邮件地址
ServerAdmin [email protected]
3)修改域名
将ServerName修改为你自己的域名
ServerName www.4spaces.org:80
4)修改网站根目录
将DocumentRoot修改为你自己的目录位置
DocumentRoot "${SRVROOT}/htdocs"
4.启动
打开cmd窗口,进入apache的bin目录,执行如下图所示命令,进行服务安装:
其中,Errors reported here must be corrected before the service can be started.意思是,若该句话后面有错误信息,则表示服务安装失败,需要先改正错误。若没有,则成功。
然后,执行下图所示命令httpd -k start ,或者直接运行bin目录下的ApacheMonitor.exe,然后点击start按钮进行启动:
5.测试
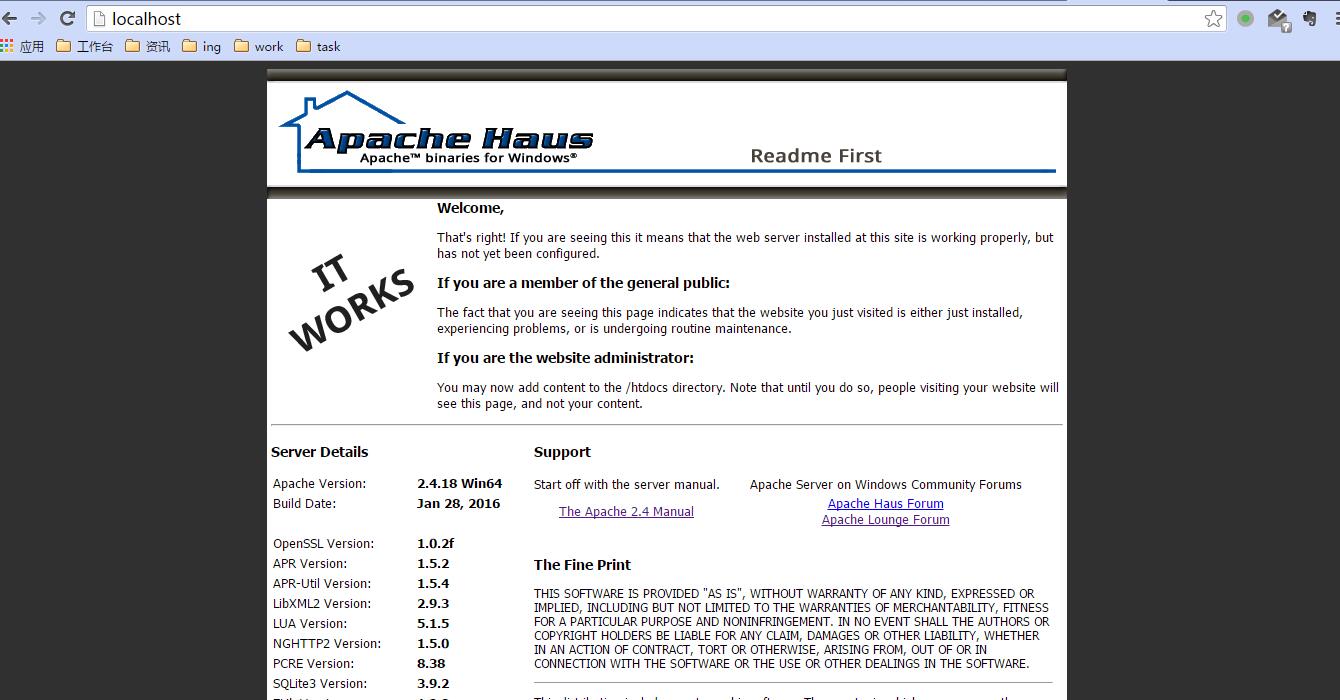
打开浏览器,输入http://localhost,如果出现如下页面说明安装成功。
6.失败原因分析
1)运行apache服务失败,提示443端口被占用
此种情况的解决方法是,搜索conf/httpd.conf文件中的一下内容:
<IfModule ssl_module>
#Include conf/extra/httpd-ssl.conf
Include conf/extra/httpd-ahssl.conf
SSLRandomSeed startup builtin
SSLRandomSeed connect builtin
</IfModule>
<IfModule http2_module>
    ProtocolsHonorOrder On
    Protocols h2 h2c http/1.1
</IfModule>
从上面的文件中可以看到,ssl启动的是httpd-ahssl.conf文件的配置,则到该文件中对端口进行修改,比如改为446
Listen 446 https
2)运行apache服务失败,提示80端口被占用
对httpd.conf文件中的80端口进行修改。
3)运行apache服务,提示计算机中丢失 MSVCR110.dll
此种情形的解决方法是到微软官方下载对vc进行支持的程序,具体地址点击[这里],下载针对你自己平台的程序进行安装即可。


最新评论
哈哈,夸张了
作者好厉害
网飞没问题, 迪士尼+有解决方案么?
pp助手是安卓手机用的,根本下载用不来苹果
已解决
这样的话数据库里的结构为{"attachment":{"content":"xxx"}}, 要怎么才能变成{"content":"xxx"},从而使结构保持一致?
赞! make test不过的坑都写到的,谢谢楼主~
谢谢你